


Category Archives: Deck
Applying spray foam insulation
 Closed cell spray foam insulation is applied to fill the gaps between the deck i-beams.
 A smaller foam application pre-fills gaps.
 The first pass with the sprayer fills the corners helping to make the insulation airtight.
 Spray foam expands to fill the gap between the overhanging deck soffit and the foundation. This helps create an airtight seal between the deck and the foundation.
 The spray foam curing in place after the first application. Two applications were made on different days to fill out the thickness of the cavity.
 LVL’s are glued, screwed and sealed in place to finish the deck perimeter.
Attaching Neopor foam blocks above grade


Deck framing details
 Blocking between the i-beams to provide structural reinforcement and air sealing above the sill and below the floor decking.
 Blocking boards pre-cut in quantity.
 Blocking installed between the TGI i-beams.
 Reinforced blocking around glulam support base.
 3/4″ Avantech flooring glued and screwed in place.
The deck is on
 First view from on top of the deck.
Sealing the soffit under the deck
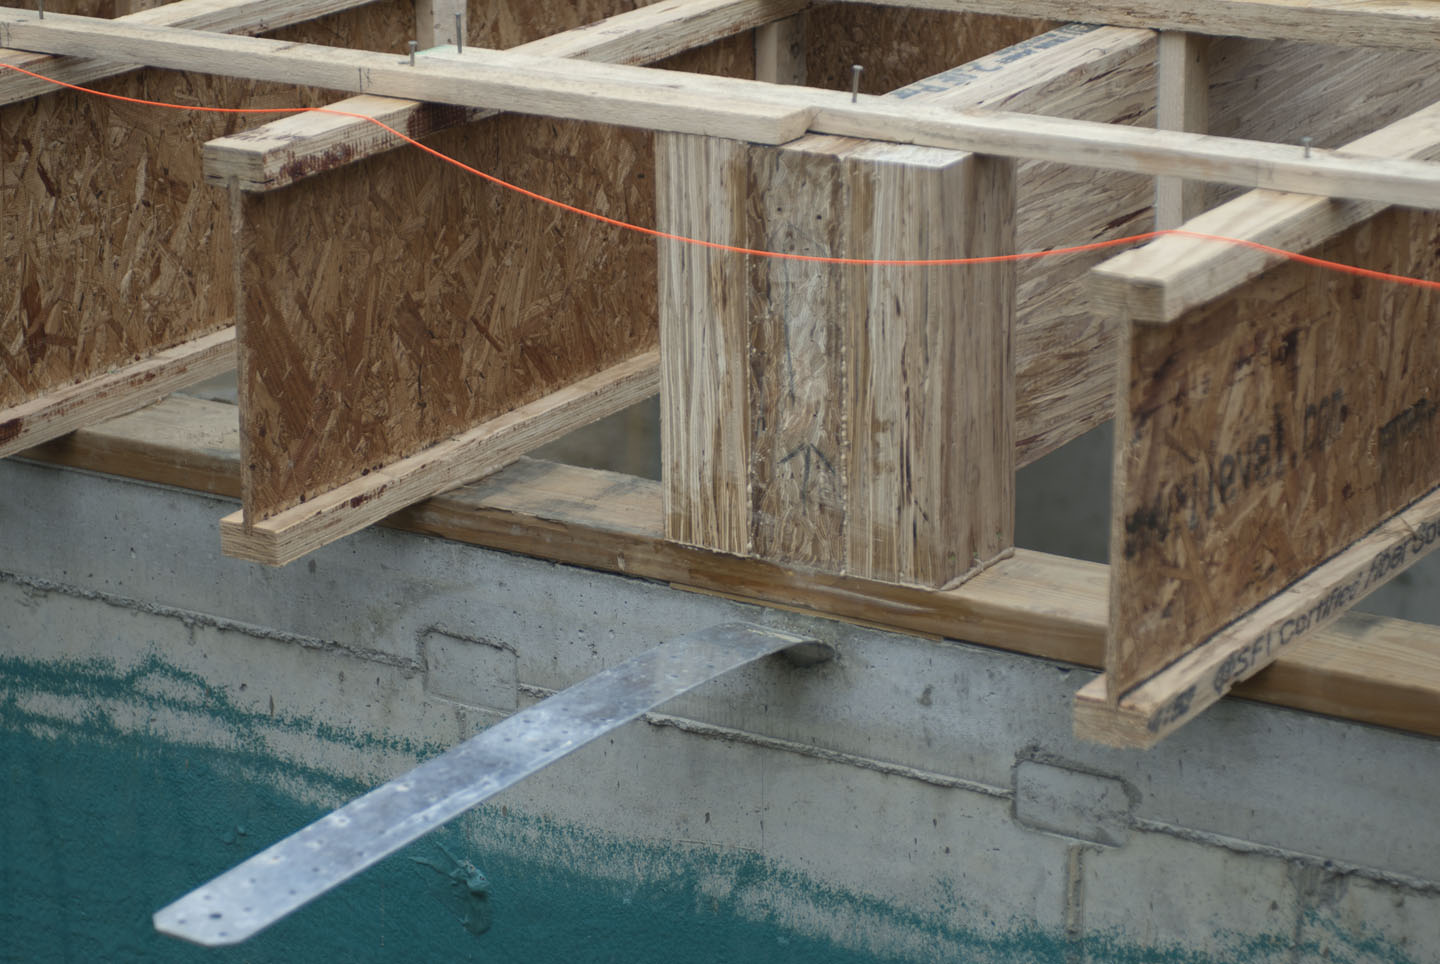
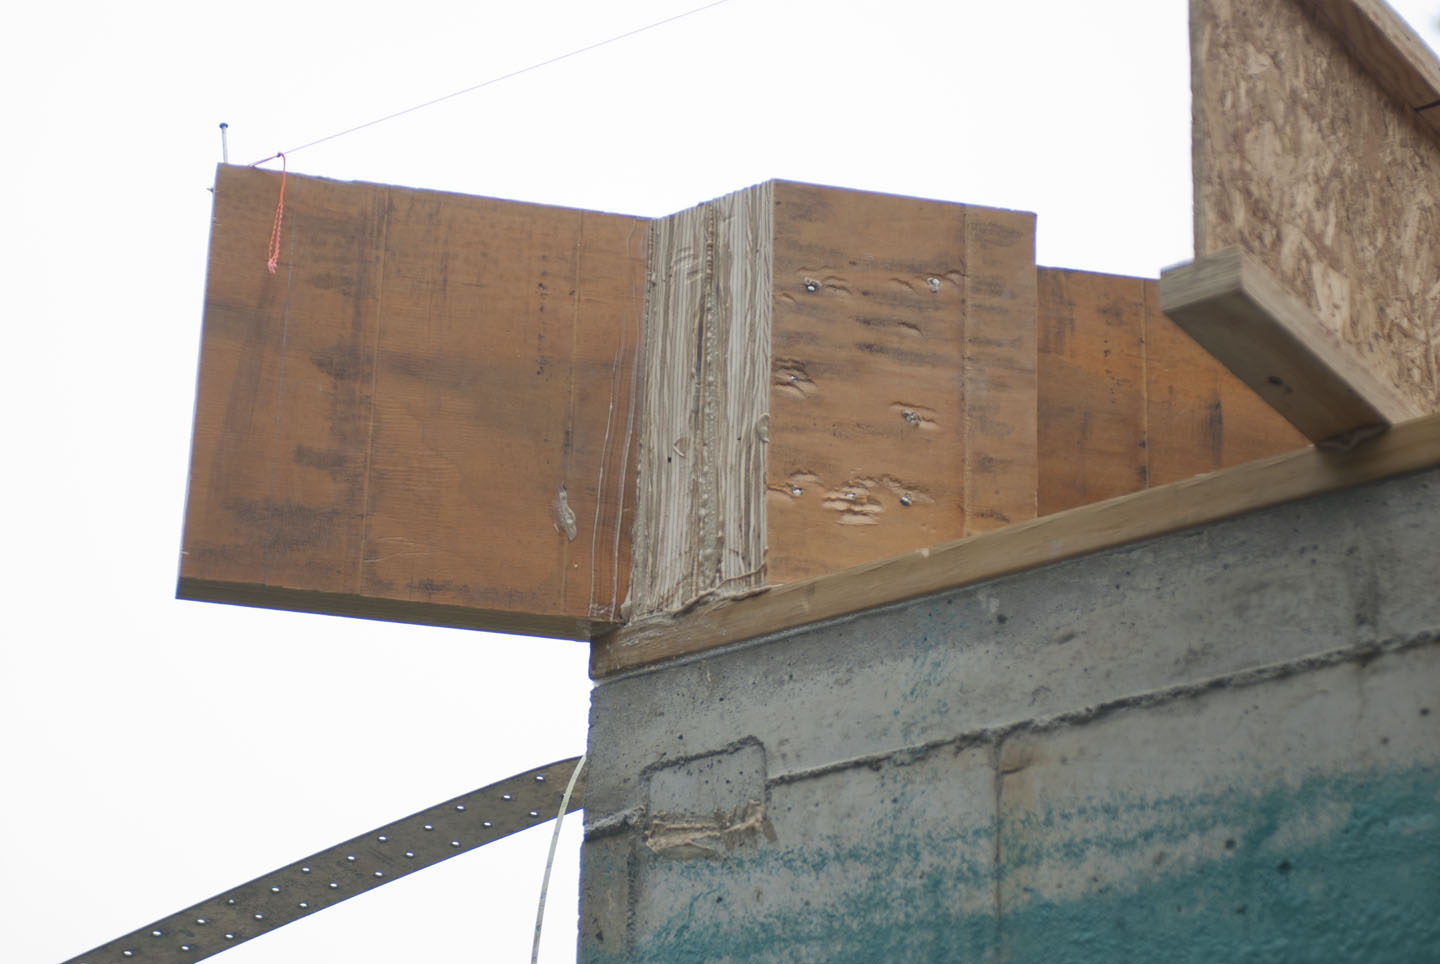
 The deck extends over the edge of the foundation, overlapping the 10″ blocks of Neopor insulation that that will attach to the foundation wall below.
  The underside of the cantilever is sealed to make the shell of the house airtight.
 The underside of each beam is glued with OSI SF-450 adhesive. The bead runs along the perimeter of the connection point. The screws go through in the middle to avoid breaking the bead seal.
  The two-by-four lumber under the soffit is an attachment point for the Neopor blocks of rigid foam insulation. The blocks will be notched out to fit. All gaps will be filled with spray foam insulation.
Deck details and the first interior framing


Building the deck


Work begins on the deck
 Rain has caused delay, so work on the deck began immediately after the slab was poured.
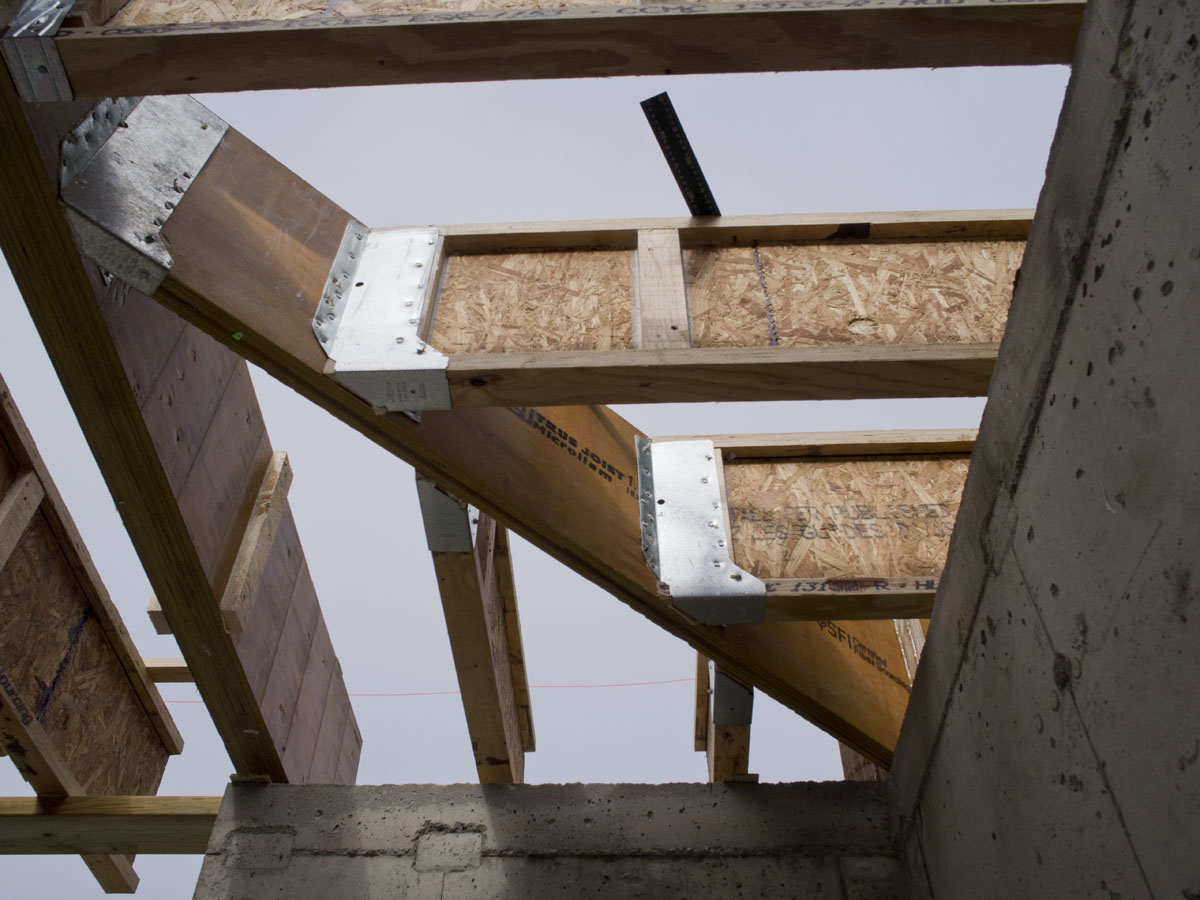
 Our first LVL beam in place.
 The vertical metal straps cast into the foundation will attach to the future glue lam frame of the house.
 Detail showing the sill sealer gasket between the sill plate and the foundation. Also, the LVL beam above is glued in place. From the beginning of construction all joints and connections are carefully glued and sealed air tight on the passive house.
 Connection point on an i-beam glued and sealed in place.
 At the end of the first day, 14″ LVL and PSL beams installed.