


 Unfortunately, the refrigeration tubing along with its thick insulation won’t fit through the 2-inch conduits that are neatly buried under the foundation to emerge inside. The work-around is to punch two 4-inch PVC conduits through the the North wall below grade. And to seal them thoroughly. The tubing to the mini splits will run through the fatter conduits.
Category Archives: Foundation
Deck details and the first interior framing


Interior space
 Blue tarp effect.
 The client (me) in my future studio space.
Building the deck


Work begins on the deck
 Rain has caused delay, so work on the deck began immediately after the slab was poured.
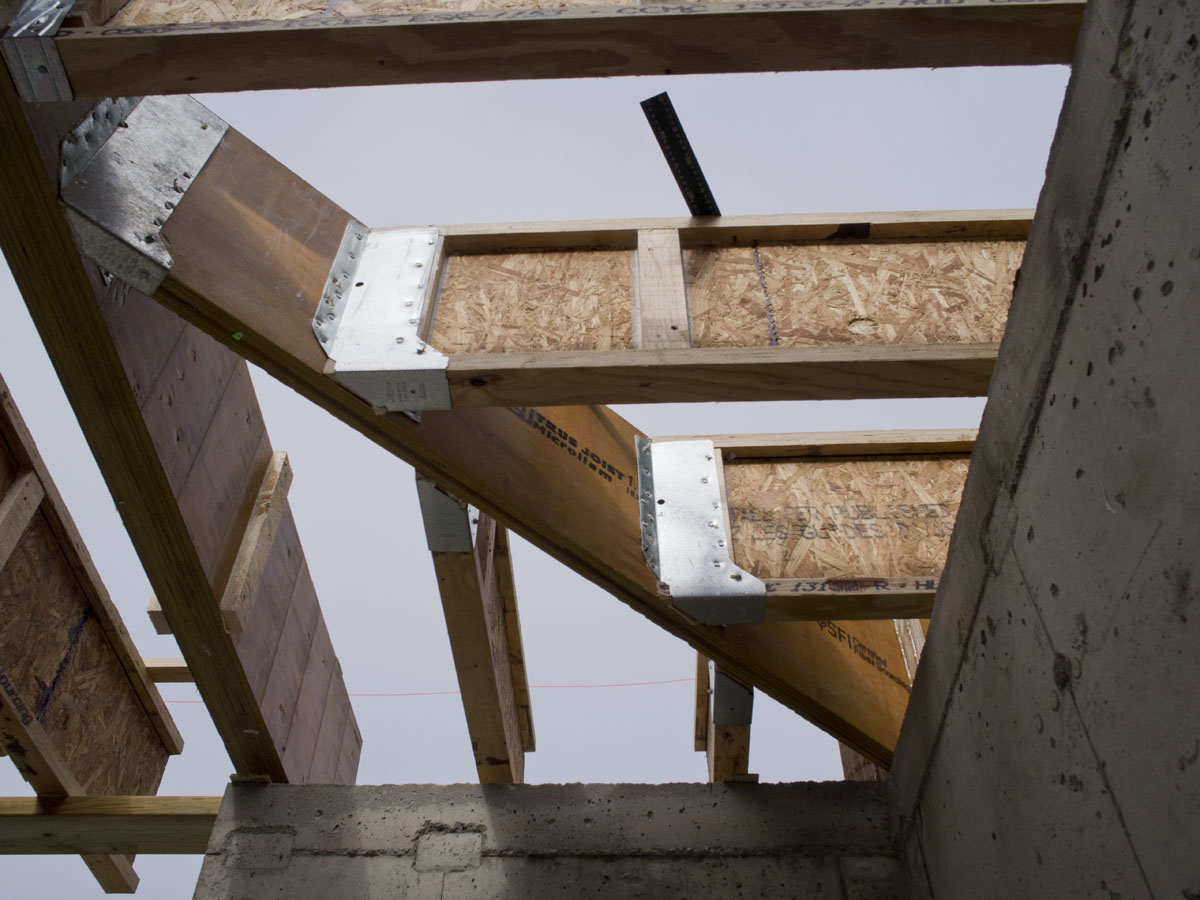
 Our first LVL beam in place.
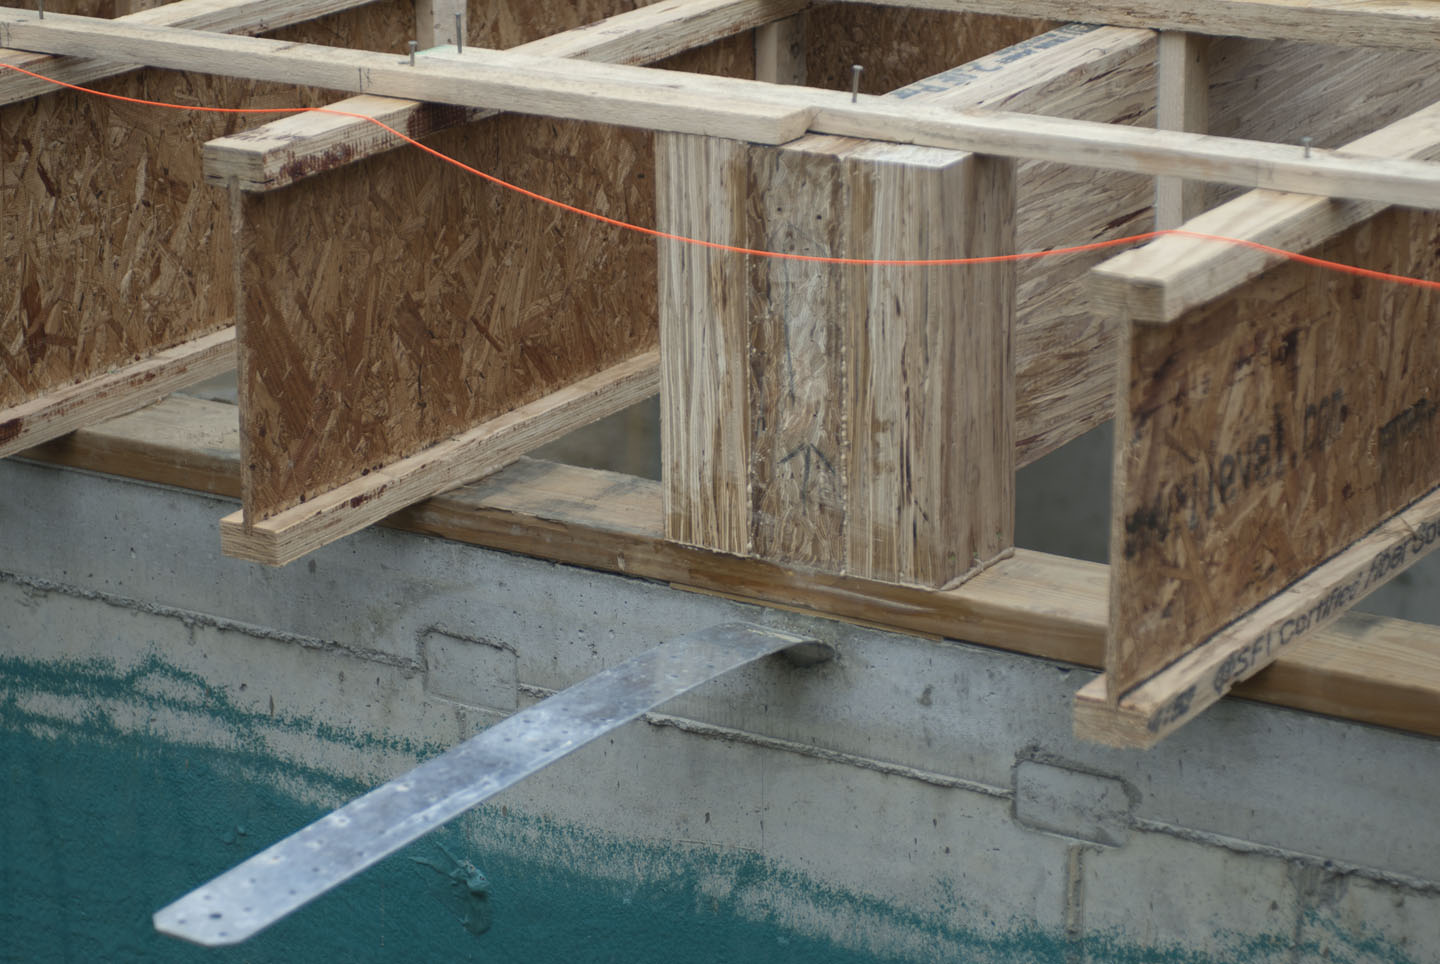
 The vertical metal straps cast into the foundation will attach to the future glue lam frame of the house.
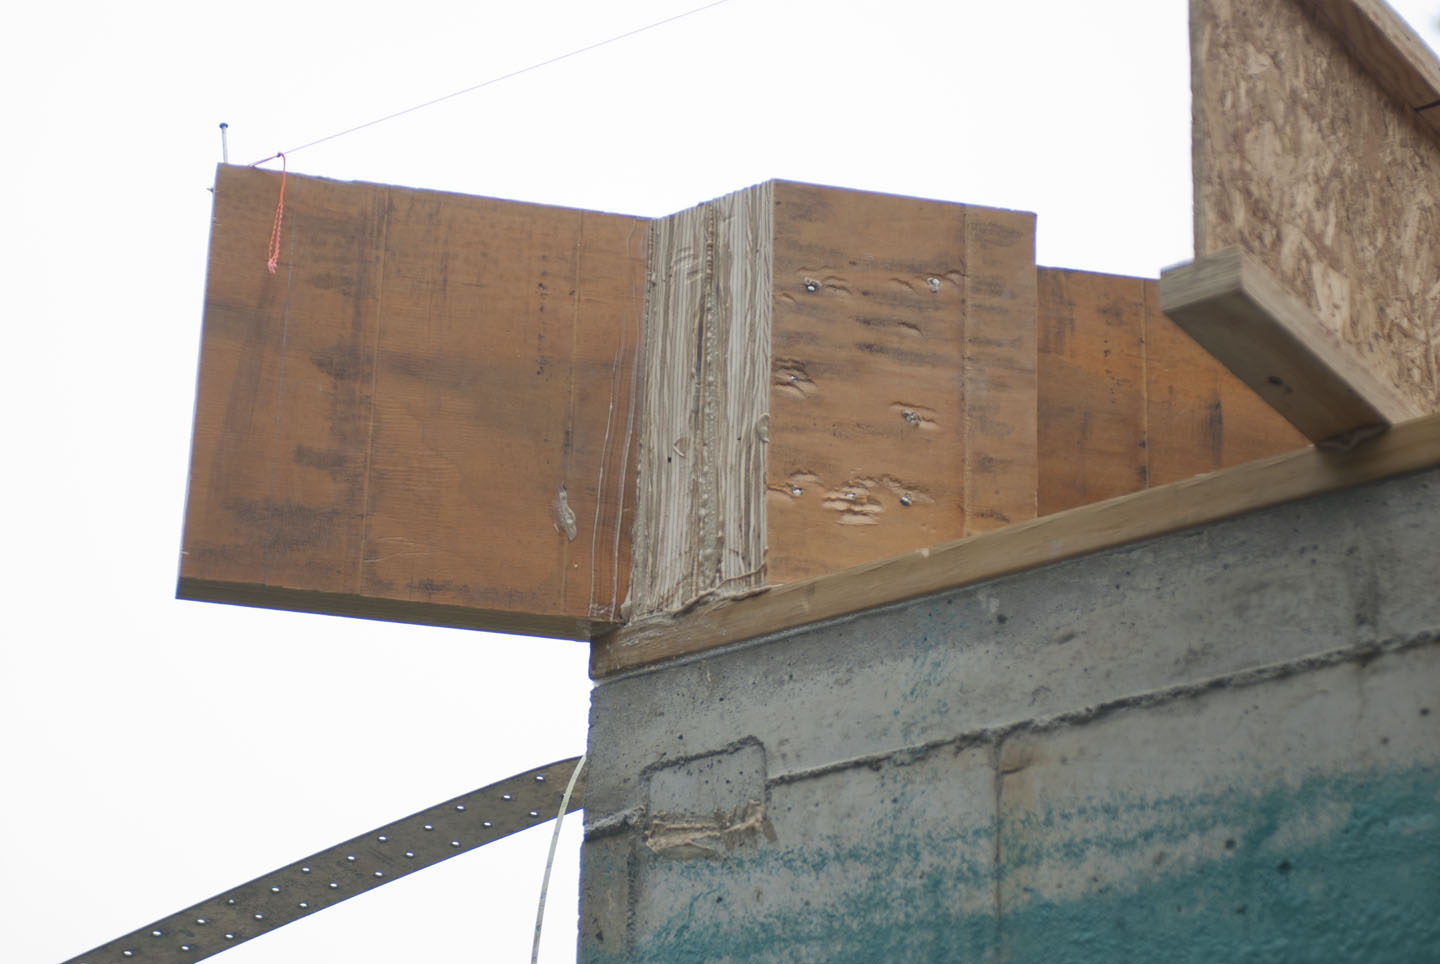
 Detail showing the sill sealer gasket between the sill plate and the foundation. Also, the LVL beam above is glued in place. From the beginning of construction all joints and connections are carefully glued and sealed air tight on the passive house.
 Connection point on an i-beam glued and sealed in place.
 At the end of the first day, 14″ LVL and PSL beams installed.
Pouring the slab
 Rain has caused delay. The slab is poured at the first opportunity of clear weather.
 4” of concrete poured on 10″ of EPS foam.
 Dan Gregg brought in extra hands for the slab pour.
 Dan and Rich from Dan Gregg foundations.
 Clearing our in-floor electrical outlet.
 Slab finishing.
 Edge polishing.
 Dan Gregg spent the day polishing the floor.
  The finished slab with expansion joints cut in place.
 The rain returned at the end of the day.
Laying down layers of rigid foam
 Site overview on foam installation day.
 The foam is brilliant white from the clear sun, making it hard to see inside the foundation.
 Hand saw through 5 3/8″ EPS.

 Fitting the 5 3/8″ x 4′ x16′ blocks.
 South end corner foam installation detail.
 The revealed square of concrete will be filled up to level with the top slab concrete pour. It will support a structural column inside the house.
Tamped stone

Applying Rub-R-Wall foundation waterproofing

Installing the radon vent

The radon vent runs inside the footing. Then it dives under the footing and pops up some distance from the house in the grassy swale. Most radon vents shoot up through the roof — but not in a Passive House, where “don’t pierce the shell” is a golden rule.